Tagged: eq, fx returns, gain, gain staging, mixing tips, mud, pre-delay, remote recording, reverb, S/N, Signal to Noise, vocal-fx
-
Instrument reverb for acoustic groups like the Avetts
Posted by Drew B on October 6, 2024 at 9:00 amHi Dana,
Wondering how you handle reverb on an acoustic group like the Avetts. Acoustic guitar, banjo, fiddle, bass.
It’s a collaborative group from different cities, so we unfortunately can’t track together to get some natural mic bleed.
Wondering if you try to get a group room sound using reverb in those situations or keep it dry?
I’m struggling to get the right balance. Keeping it dry keeps the best clarity for the vocal to shine but does feel a little too dry. Whereas when I add a little room reverb to everything, it gets a little too muddy too quick.
Any tips?
Jesse Lewis replied 1 year, 3 months ago 4 Members · 12 Replies -
12 Replies
-

Drew,
I’m guessing here that these are all separate tracks that you or the engineer have discrete level control on to send to the reverb. If that’s accurate, see if keeping the bass reverb-free (TM) allows you to sneak the reverb in more gently without it crossing the line into too much. Another approach to try might be high passing the reverb return. Allowing only low-mids (200Hz ish) and above into the soup’s seasoning to give the illusion of a room’s space but avoid the inarticulate mumbling of a sloppy low end.
I’m gonna learn something here also when Dana shares his thoughts.
PT
-

Hey Drew, thanks for the excellent question, and I love the multi-city remote collab! There are actually a handful of songs on the latest Avett Brothers’ album that I recorded in the same manor, remotely, one or two instruments at a time.
@-PT has already beat me to the punch with some great suggestions that help make a huge difference in the “reverb vs mud” battle. I’ll quickly reiterate a few of those and rattle off a few more musings that might help…
- It sounds like what you need is something subtle. Something more felt than heard. Something you’ll perhaps notice on headphones but much less so on speakers. In these situations (really, in all situations), finding the right reverb is essential. Take your time, try different units/plugins and then try different “room” or short decay presets on offer within each plugin. Then, when you find something close to what you envision, wiggle all the parameters/knobs from 0% to 100% and learn what they do by hearing the effect change. From there you’ll learn which knobs help turn that “almost there” preset into the perfect sound in your head. One room-style reverb I’ve turned to often is the UAD Ocean Way plugin.
- Once I’ve twiddled knobs and gotten as close as I can on one preset or plugin, I might bypass the plugin, duplicate the plugin onto the next insert and go hunting for “option B”, repeating the same process as above with a different “almost there” preset. Or load up an entirely different reverb plugin/engine on the next insert and see what kind of magic I can stumble onto with that. I might end up with 3 or 4 bypassed reverb options ready to go, ready to un-bypass and try on at any time. I might fall in love with one option for 20 minutes or 2 weeks and then all the sudden realize I kinda hate it, lol, then I can quickly switch to another reverb option I’ve already spent time on and is already really dialed (by me) and ready to go.
- Finding the perfect verb for each song is hard. And it’s fun. If you’re not landing on something special right away, that’s perfectly natural. If you follow the steps above, and are diligent about saving your own fav presets along the way, you’ll start amassing your own collection of go-to reverb settings you can call on again and again.
- I almost always end up EQ’ing the reverb for final adjustments, either by using the eq settings within the reverb itself, and/or by adding an additional EQ insert after the reverb. An amazing de-mud trick as @-PT mentioned is to reduce or cut the low frequencies of the reverb return. Fantastic trick. I also often times use some shelving EQ to reduce the high frequencies too if needed.
- Play around with the reverb’s pre-delay setting. Listen to how the effect changes as you move from 0% to 100% pre-delay. Pre-delay is measured in milliseconds, not percentage, but I mention percentage ’cause I’m a big advocate of pushing all knobs of all your plugins to THE MAX so you can really hear what each knob does. Pre-delay will delay the reverb, giving your source sound time to poke through the mix, dry for a moment, before the reverb is heard. This is another great trick to avoid a verb-y muddy soup. And it can be an exciting effect when pushed to the extreme!
- When recording instruments in isolation, such as in your remote recording situation, I always like to include some extra mics picking up the room, which may (or may not) come in handy during mixing. This could be a) a very intentional positioning of close mic for direct sound plus a pair of mics in X-Y configuration deliberately positioned a few feet from the sound source; or b) a more haphazard approach with a close mic for direct sound plus whatever other mics happen to be set up around the room at that given moment, regardless what they’re pointed at. Haha. Sometimes this produces the most amazing natural room sound cause it kinda imitates what it might sound like if you WERE all recording in the same room together.
Ok, I could go on and on and on, cause I love this stuff and this question and I’m all fired up and excited now haha, but it’s almost 2am and I have a session in the morning. I hope these tips (and those from other MP members and guests) will provide a bit of mix inspiration for you and your project, @DrewB! Feel free to post your audio progress in the Member Spotlight forum – would love to hear it!
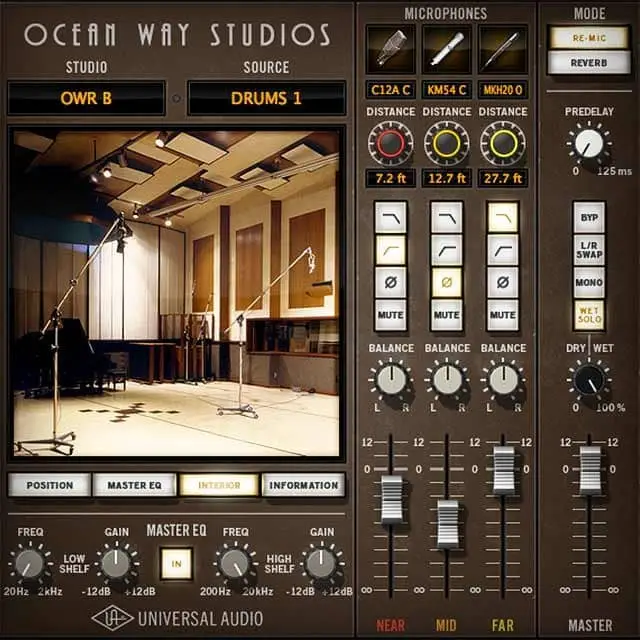
uaudio.com
Ocean Way Studios | UAD Audio Plugins | Universal Audio
Retain mic bleed, proximity, and other naturally occurring behaviors for realism with the Ocean Way Studios Plug-In. Learn more.
-
One last thing .. I should also clarify that I almost never ever insert reverb directly on the source track. I always send individual tracks to reverb via an aux send, with the reverb inserted on an aux return track (with the reverb’s mix/blend knob set to 100% wet). This will give you the most control over the sound of each track, and will be the most efficient use of CPU-hungry reverbs. 🤓
-

This is all great! thanks for the question and all the thoughtful responses. I was going just going to ask about the send/return and you beat me to the punch. I’ve been messing around with UAD Sound City plugin for room sounds recently. pretty cool. I need to check out the ocean way too! Thanks all!
JLew
-
-

Wow! Thank you so much @-PT & @dana for the detailed responses.
I at least feel that I’ve been on the right track after reading some of the tips 😎
You both mentioned EQing the reverb. Ironically, I’ve been experimenting with the Ocean Way (and Sound City) plugin from UAD for my room reverb. While I have used the microphone high-pass settings, I haven’t EQ’d much beyond that. So I will give standalone EQ & high-passing a try.
@dana – the “Start at 100%” is super helpful so far. I found myself being okay with a much longer pre-delay when I started with 100% vs 0%. Not sure the psychology behind it, but I’m leaning towards longer settings now that have a bit more “space” to it and help open things up.
A couple of short follow-ups now that I’m down this path!
1) Do you pan the reverb send towards the pan of the instrument? For example ‘Follow Main Pan’ in Pro Tools or something like that?
2) Do you generally send the same levels of the instruments to the room reverb?
Will try to post a few before / after samples once I arrive at something I’m liking.
Many thanks!
Drew-
My pleasure, @DrewB!
1) Do you pan the reverb send towards the pan of the instrument? For example ‘Follow Main Pan’ in Pro Tools or something like that?
- That’s a great option and solid starting point! That said, I don’t follow that as a rule. In fact, sometimes I LOVE panning the direct signal on one side of the stereo spectrum and the reverb on the other side (great trick for delays too). Or whatever panning floats your creative boat! If your goal is realism though, then yeah, ‘follow main pan’ is a great choice.
2) Do you generally send the same levels of the instruments to the room reverb?
- No way, man! I mean, you certainly could do that … and it might end up sounding perfect. But … don’t miss out on additional creative options by applying a unique amount of verb to each instrument, giving the listener a sense of depth. For example, maybe the lead singer has very little room verb (send level very low), and the tambourine that enters in the chorus is tucked into the mix at a low volume but with lots of room verb (send level very high) to give the illusion that it’s farther away. You could magnify that effect even more by setting the tambo’s verb send to ‘pre-fader,’ which will allow you to tuck the direct tamb signal way down low (via the main mixer fader) yet still have plenty of signal sent to the verb (via the send fader). This is because, when sends are set to ‘pre-fader’ (aka ‘pre-fade’) they have full access to the dry signal before (aka ‘pre’) that dry signal gets turned down – or up – by the mixer fader.
Happy verb-ing!
Dana
-
-
-
@dana One more question (haha) if you don’t mind….This one has really been keeping me up at night 😅 It’s about the amount you send to a return VS the level on the return channel itself… I made a video for the question which seemed easier. Curious to hear your thoughts (and anyone else’s) on this subject:
https://youtu.be/tprL_DAkPZ8youtu.be
Enjoy the videos and music you love, upload original content, and share it all with friends, family, and the world on YouTube.
-
I think it’s really a gain staging question.
You could send all the signal you want as long as you don’t overload the input to the verb. If you clip the verb input, that nasty digital schmutz will be baked into the verb return no matter what level you choose to use at the fader. You will have boxed yourself into a corner of somewhere between quiet distortion or “Oh Fuck!” fader dependent. In the old days, analog gear would be quieter when operating at healthy, but below clipping levels. The newfangled digital stuff seems to have a much better S/N ratio allowing a bit of slop in gain staging. There’s an argument to be made that the resolution of the reverb would be finer if all the digital bucket is filled with signal. No idea how audible that would be.
-@PT
-
Love the video, homey!! And excellent question.
As @-PT mentioned, what you’re discovering is gain staging (🥳), which refers to how we manage gain as it is applied (or reduced) at many different points in a signal path on its way to our ears.
Your video example shows one sound source with one send and one return in a digital audio workstation, where we don’t have the typical analog issues to contend with such as Signal to Noise ratio (S/N as commonly abbreviated like in Paul’s reply). As such, the answer to your specific video question is: there would be no difference. Kinda like, “do you get a different answer adding 1+9 vs. 9+1?” Nope. In a perfect, zero-noise digital world, they will both equal 10.
However, even in the digital world, here are 2 caveats that come to mind right away:
- When you’re sending multiple tracks to the same return, each with their own unique send level, the gain staging balancing act becomes much more complex. As a starting point, keep your return faders at 0db / Unity Gain and use the send pots/faders on your individual tracks to achieve the sound you want. Later on, if you feel you like the sound of the reverb but would love a little less of it overall, you can easily turn down the return fader for a quick win. Just be mindful: if you do that over and over your gain staging will get F-d up lol, as you’ll end up wanting to add more reverb to a track whose send is already at 100% cause you’ve turned down the reverb return fader too far over time.
- There are certain situations when I deliberately keep my send levels high and my return level low, even in the digital domain. Any time the effect(s) on the return path have some kind of harmonic distortion element or compression element I want to feed them lots of signal (via the sends). But maybe I don’t want the resulting effect so loud in the mix, so I will turn down the return fader — Or, if the final plugin inserted on the return has an ‘output’ knob I might utilize that instead or in addition to the fader … again, gain staging.
Hope these tips help!
-
This response helps me feel SO much more confident in understanding this concept. Many thanks to you and @-PT (as always) for the wisdom and generosity. Now I can finally sleep again!!!
but seriously man — this forum and community is so important to me, I thank you for creating this space.
JLew
-
-
-
-
Log in to reply.