PREP SCHOOL
-
MixPrep Process 1: Starting from Multi-Track Stems
1. Organizing Files and Folders -
MixPrep Process 2: starting from an Existing Pro Tools Session2. Creating the Pro Tools Session
-
3. Preferences and Track Colors1 Quiz
-
4. Track Layout
-
5. Track Names
-
6. Mapping the Tempo
-
7. Strip Silence
-
8. Routing Print Tracks
-
9. Submasters and Stems
-
10. Creating Custom FX Presets
-
11. VCA
-
12. D Command and the Finished Product
-
13. Save As
-
LIVESTREAMS10-19-23 LIVE Mixing and Editing - Acoustic Pop Singer-Songwriter [PS]
1. Organizing Files and Folders
Lesson 1: Organizing Files & Folders
Overview
My mix process often begins by receiving a batch of raw stems exported from the artist’s or engineer’s multi-track DAW session (Logic, FL Studio, Ableton, Pro Tools, etc.). Having a dedicated system for organizing files and folders is crucial, especially when you’ve amassed decades-worth of project data on your hard drives. Consistency is key!
Here is my process for creating a brand new Pro Tools mix session using multi-track “stems” exported from the client’s DAW (or tape machine!)
Step 1
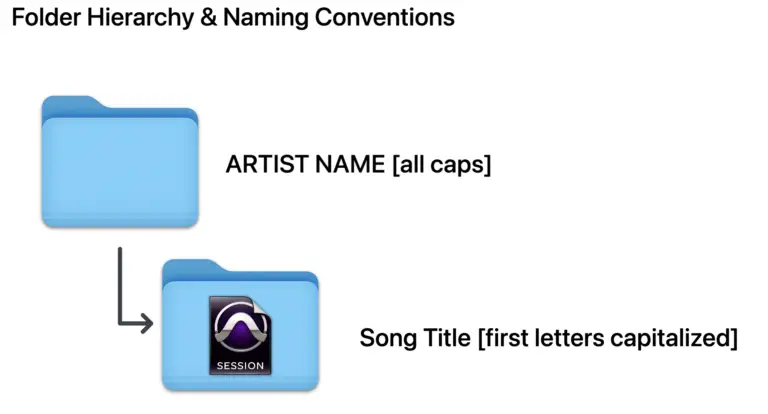
Create a new folder and title it using the ARTIST NAME in all caps. This will become the “master folder” inside of which all individual “song folders” will reside.

Step 2
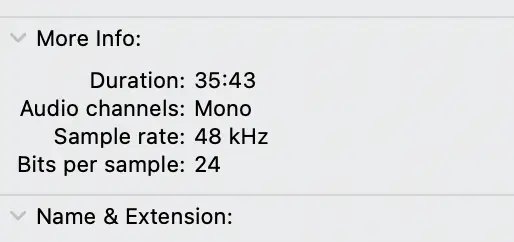
Determine bit-depth and sample rate of stems. Using the Mac Finder (or similar on Windows PC), select one of the audio files in the Stems folder and “Get info…” (⌘-i). In the example below the client has supplied 24 bit / 48k .WAV files. We’ll use this information when creating the Pro Tools session in the next step.

Step 3
- Create a new Pro Tools session using the Song Title naming convention illustrated in Step 1 and following these guidelines:
- Select the same bit-depth, sample rate, and audio file type (.WAV, AIFF, etc) as the stems, determined in Step 2. This will avoid needless upsampling, downsampling, and/or duplicating of files.
- Please always select the “stereo interleaved” option when creating your session.
- Save the new session in the [ARTIST NAME] folder.
Step 4
Move STEMS folder inside of the newly created “Song Title” folder where the PT session file resides. This keeps things tidy so that everything needed for the Pro Tools session resides in the Song Title folder.
Step 5
Drag-and-drop stems onto Pro Tools Edit Window timeline “vertically” so that each stem gets its own track in pro tools.
Keyboard shortcuts, track presets, Pro Tools session, I/O Settings, and more available in the PREP SCHOOL Toolkit (available in chapters 3 through 13 with course purchase)
Responses